This article is the second in a series on using AWS for static site hosting. In this article, we'll cover what S3 is and go through a step-by-step guide on how to set it up for hosting a static site.
What is S3?
Amazon S3 (short for Simple Storage Service) is used for, as the name implies, online file storage. Files that are uploaded to S3 are called objects and they are stored in discrete user-defined containers called buckets. S3 allows for a granular level of access control, permissions management, and importantly for our purposes, can be configured to provide an endpoint to serve a static site from the files contained in the bucket.
Setting up S3 for static site hosting
First off, you'll need to create an AWS account if you don't already have one and then navigate to S3 from the AWS console. From there, select the Create Bucket option, you'll be brought to a configuration screen.
Bucket configuration
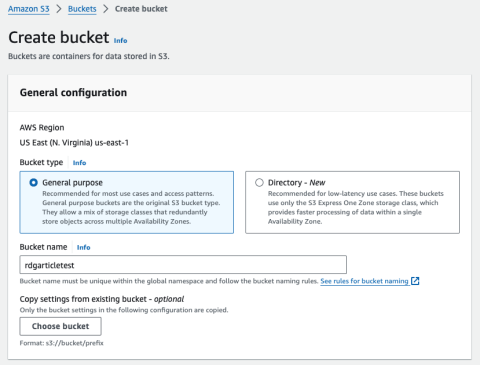
1.) Under the General configuration tab you can leave the Bucket type as General purpose and give your bucket a name that will match the eventual domain/base URL of the static site.
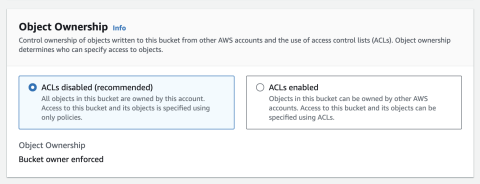
2.) Under the Object Ownership tab, leave the default ACLs disabled (recommended) option selected.
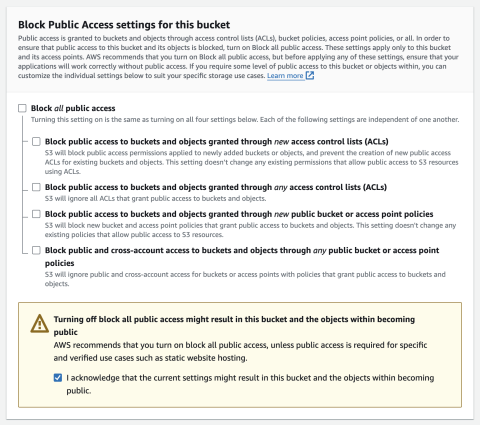
3.) Under the Block Public Access settings for this bucket tab, unselect the Block all public access setting and then select the acknowledgment that pops up below. This will make the bucket contents accessible to the public and is what will enable the site to be viewed by users.
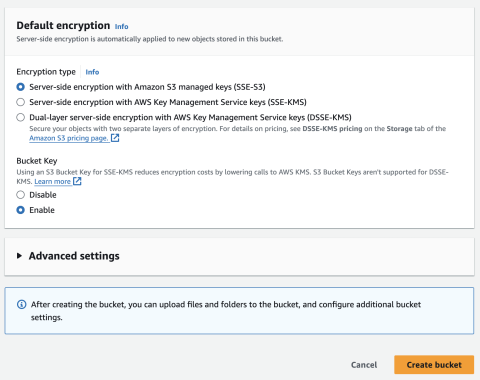
4.) Leave the rest of the settings in Bucket Versioning, Tags, and Default encryption as-is and then hit Create bucket at the bottom of the configuration screen.
Static hosting configuration
1.) Once the bucket has been created, enter it and navigate to the Properties tab.

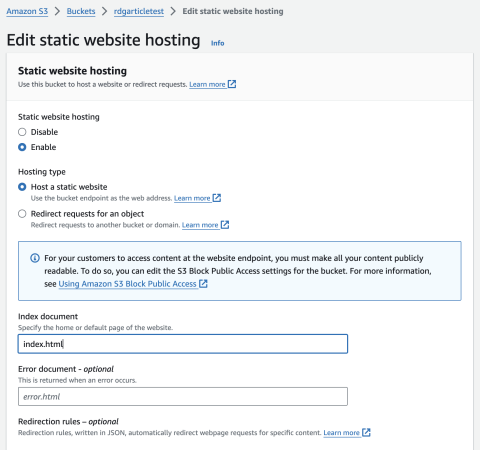
2.) Scroll to the bottom and select Edit under the Static website hosting section.

3.) From there, enable static hosting and set an index document for most sites this will be index.html. Then, save your changes.
Access control setup
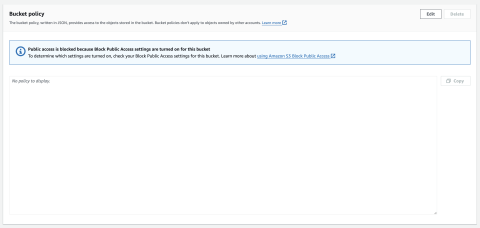
1.) After static hosting is enabled, navigate to the Permissions tab and scroll down to the Bucket policy section and hit Edit.
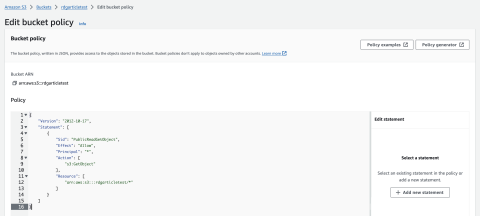
2.) Under the Policy editor, paste the following JSON (provided by AWS), replacing Bucket-Name with the name you gave your bucket. In our example it is rdgarticletest:
{
    "Version": "2012-10-17",
    "Statement": [
        {
            "Sid": "PublicReadGetObject",
            "Effect": "Allow",
            "Principal": "*",
            "Action": [
                "s3:GetObject"
            ],
            "Resource": [
                "arn:aws:s3:::Bucket-Name/*"
            ]
        }
    ]
}
Uploading files
1.) The last thing you need to do is upload your static files. To do this, navigate to the Objects tab and hit Upload.
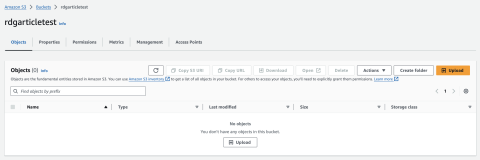
2.) Drag and drop the file(s) for your static site into the interface and hit Upload.
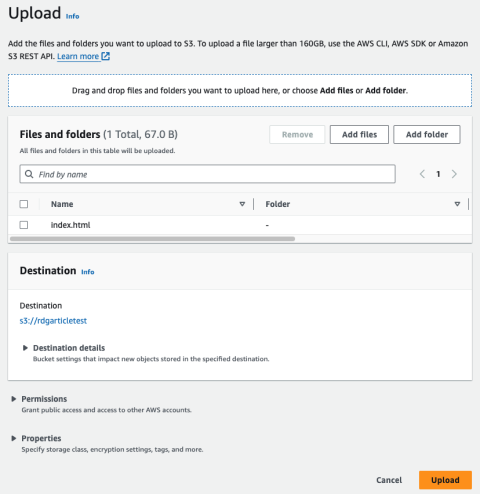
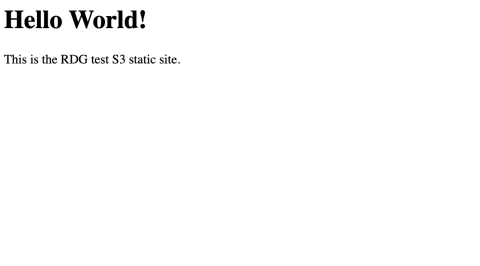
3.) Once completed, your static site will be ready to access at the endpoint URL listed in the Properties tab under the Static website hosting section. If everything has been set up correctly, you should see the content of your uploaded index.html file when you visit that link!
Deploying updates to S3
The simplest method is to manually upload the new/updated files within the Objects tab and overwrite the existing content.
For a more automated approach, you can set up a continuous delivery (CD) process via a tool such as Bitbucket Pipelines or GitHub Actions if you use one of the aforementioned Git solutions for version control. This requires more setup work but doesn't require someone to go in and manually upload files in S3 every time you need to make a change.
Remember that if you are using CloudFront to apply a domain and SSL to your static site (explained in another article), when you deploy new or updated files to S3, you will need to create a new invalidation so that users will see the updated content right away.
Need a fresh perspective on a tough project?
Let’s talk about how RDG can help.
